Service Manager powered by HEAT
Adding Related Business Object Lists to a Form
•About Adding Related Business Object Lists to a Form
•Adding Related Business Object Lists to a Form
•Example: Using the Related Objects List
•Example: Using Flex Settings to Implement a Visual Indicator
About Adding Related Business Object Lists to a Form
This control allows contents from related business objects to show on the Master Object form. You can configure additional operations of related items. Allowable operations included are: add new, edit, delete, link, and unlink. You select the fields from the related business object that appears to users, define the format, and specify the sorting sequence of the displayed business objects. Specific formatting is provided for email, notes, and text messages.
Adding Related Business Object Lists to a Form
1.From the Configuration Console, click Build > Business Objects to open the Business Object workspace.
2.Open a business object.
3.Select the Forms tab. A list of forms for that business object appear.
4.Select a form. The Form Editor appears.
5.From the left control pane, expand Other, then drag Related Objects List onto the form.
6.On the right side, highlight the words "Related Objects List".
7.Under the Control Properties tab, for the Configuration value, select Flex Settings. The Related Objects List window appears.
8.Enter information into the fields.
| Field | Description |
|---|---|
| Related Object | The related object. Select from the drop-down list. |
| Sort by | The field to sort by. Select it, then select the sort order from the second drop-down list. |
| Operations |
The operations to allow. New Edit Delete Link Unlink Flex height: Enables auto-resizing of the selected content box. See also Maximum Height, Minimum Height. Dimensions of rows contained within the content box are controlled by the Show Items as Width, Height. Multi-select |
|
The maximum and minimum height in pixels. The minimum height is the smallest that the list or content box can appear. The maximum height is the largest that the list or content can appear without scroll bars. If the content exceeds the maximum height, the system displays scroll bars. Set these to allow for auto-resize of the list or content box, then check Flex height.
NOTE: If you check Flex height, the system disables these choices and you cannot change them. |
|
|
Defines how the data is arranged. Select an option and then enter the width and height of each in pixels. Rows: Each item takes up an entire row and the list is displayed from top to bottom. Blocks: Each item takes up a certain amount of space and is displayed from left to right. Shrink to fit: Depending on the content, this option designates a height to the row, between values set for the Height Min and Height Max fields. |
|
| Types |
The type of related object. Types vary according to the selected related item. You can select multiple types, but must configure each type separately. Journal# Journal#Email Journal#Notes Journal#RemoteControlSession Journal#VoiceActivity |
| Type configuration | |
| Show as | How the item appears on the form. The default is Generic. This also affects which fields appear in this window. Click Test to see a preview. |
| Message User Name | Includes the user name in the message. |
| Message Date | Includes the date in the message. |
| Message Time | Includes the time in the message. |
| Text Field | The text field type. Choose from the drop-down list, or choose None to not include an editable text field. |
| Text Display Length | The number of pixels for the width of the text field. Zero means the field does not appear. |
| Show as HTML | Specifies if the related object list is shown as HTML. |
| Highlight | |
| Item Click | The action that occurs when the user clicks from the drop-down list. |
| New/Edit Form | The form displayed when the user clicks the edit icon. The form can be edited and saved by the user. |
| Saved Searches | The saved searches. Select from the drop-down list, or choose None to not include a saved search. |
| Show Attach As |
Available for business objects that can contain attachments (such as Journal#Email and Journal.RemoteControlSession). None: No attachments will display Link: Attachments display as links (recommended option) Block: A clip icon appears when there are associated attachments. Click the icon to display them. |
| Attach Relation | Displays the relationship to the attachment object. The option is available if you selected Link or Block for the Show Attach As field. |
| Attach Display Field | Displays the attachment link. |
9.Click Save.
10.Adjust other control properties as needed, then click Save.
Example: Using the Related Objects List
This example shows how to show a list of knowledge articles associated with a specific incident.
1.From the Configuration Console, click Build > Business Objects to open the Business Object workspace.
2.Open the Incident business object.
3.Select the Forms tab. A list of forms for that business object appear.
4.Select Incident.WebSelfService.New.
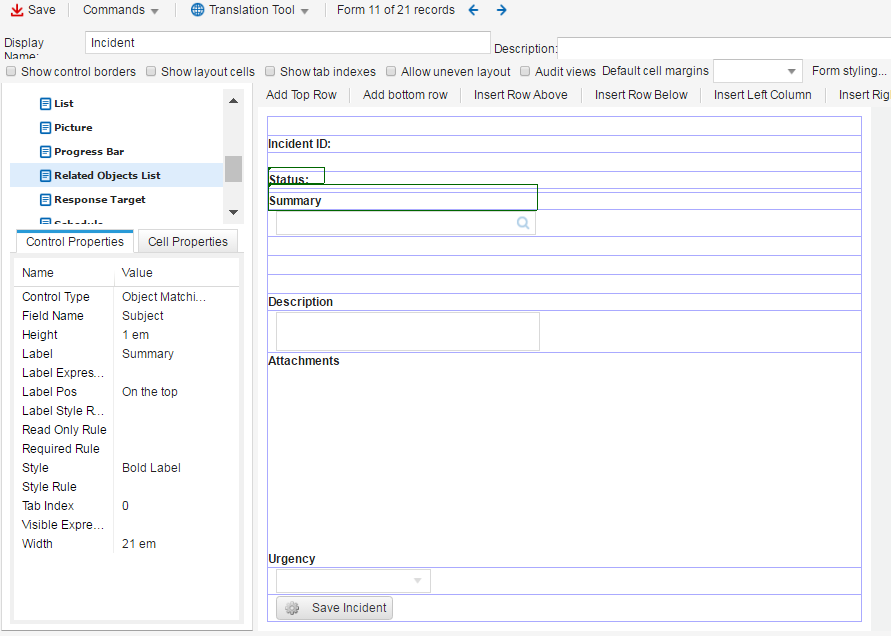
5.On the right side, select a field on the form for the flex list to appear below. For example, highlight the Summary field.
6.From the Commands menu in the toolbar, choose Insert > Insert Row Below Selection. This gives you a place in which to put the flex list.
7.From the left control pane, expand Other, then select Related Objects List.
Related Object List
8.Drag the control onto the form into the space you created.
9.Highlight the words "Related Objects List".
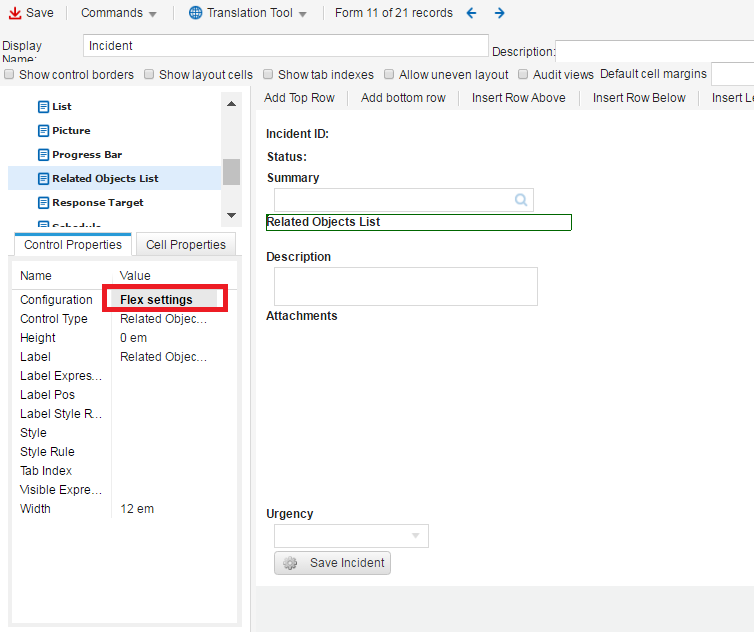
10.Under the Control Properties tab, for the Configuration value, click Flex Settings.
Control Properties - Flex Settings
11.From the Related Object drop-down list, select IncidentAssocFRS_Knowledge.
12.For the Show Items as field, select Rows.
13.Under Types, check FRS_Knowledge#, then continue selecting data from the remaining fields.
14.Click Save.
15.Click Save.
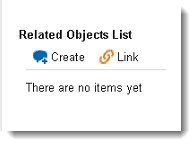
16.View the form on the Service Manager Application to see the Related Objects list.
Related Objects List on the Service Manager Application
Example: Using Flex Settings to Implement a Visual Indicator
In Ivanti Service Manager Release 2016.2, we introduced a new setting that allows you to add a visual indicator for a flex setting based on an expression. This setting is currently used to configure the read and unread flags for journal notes and emails. It marks those items with a blue bar that is located on the Journal section of the parent form.
The following shows how to implement the visual indicator on the journal flex setting for an incident.
1.From the Configuration Console, click Build > Business Objects to open the Business Object workspace.
2.Open the Incident business object.
3.Select the Forms tab. The system displays a list of forms for that business object.
4.Open the Incident.DefaultForm form, which is where the Journal child business object is embedded.
5.Click on the Journal section on the right pane to select it. The box around the property becomes visible and the options under the Control Properties tab in the left pane appear.
Journal Area of a Form

6.From the Control Properties tab on the left pane, for the Configuration field, click Flex Settings. The system displays the Related Objects List dialog box.
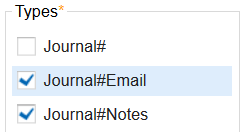
7.Under Types, highlight Journal#Email and ensure that it is checked.
Selecting Journal#Email
8.Under Type configuration: [Journal#Email], click in the Highlight field. The system displays the Expression Editor. Enter $(IsUnRead & ParentOwner == CurrentLoginId()) and click Save.
9.In the With Style field, select a background color. We recommend selecting BlueLabel.
10.Click Save to exit the dialog box.
11.Click Save.
Was this article useful?
The topic was:
Inaccurate
Incomplete
Not what I expected
Other
Copyright © 2017, Ivanti. All rights reserved.